
ITO transparent heater has become a trusted thin film heating option for engineers who want clear, stable, and fast heating on glass or plastic surfaces. Many projects today—from cameras to displays—need warmth without blocking visibility. That is why more designers turn to ITO coated glass heater, transparent heating film, and other thin film solutions to keep screens and lenses free from fog or frost.
This guide walks through how the heater works, its strengths, its limits, and how to install it in real projects. You will also find a simple comparison with OCA transparent heating film. At the end, you can decide which solution fits your needs with confidence.
Danyu Electronics has been supplying custom transparent heaters for years. Our work covers ADAS cameras, machine vision, drones, medical devices, freezer doors, and many other optical cases that need clear heating. If your project needs a stable thin film heater, we can support your design from concept to mass production.
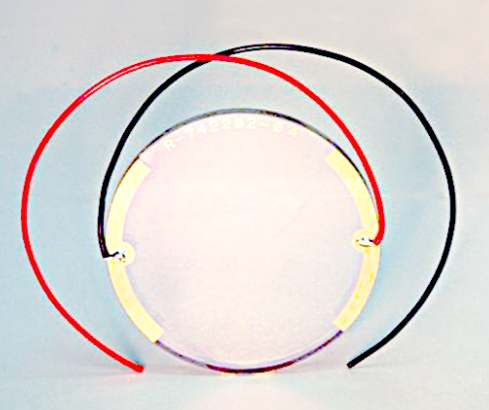
An ITO transparent heater is a thin film heating layer made from indium tin oxide. The coating is applied onto glass or PET. It stays almost invisible because ITO has both electrical conductivity and high optical clarity. When low voltage current passes through the film, it converts to heat. The surface warms in a smooth and even way across the full area.
Engineers like this type of heater because it brings together transparency, uniform heating, and low power needs in one simple form. The heater is also thin, which makes it easy to use in tight spaces. These advantages make the thin film heater suitable for small sensors, large windows, and everything in between.
No, indium tin oxide is considered safe in normal product use. It stays locked inside the coated layer and does not release harmful material when the heater runs. In most cases, users do not touch the ITO surface directly because it is laminated under glass or protected with a clear top sheet. Even in open-form heaters, risk is still low as long as the heater is not damaged.
During industrial production, workers follow strict handling guidelines because the powder form can irritate the lungs. But once the heater becomes a finished part, it is stable and does not carry common toxicity issues.
Even though the heater is strong in many ways, ITO still has some limits. These points help you understand when it may not fit your project:
1. ITO can crack when bent too much. For curved or flexible surfaces, PET-based film is better, but even then heavy bending is not suggested.
2. The conductive layer can scratch if unprotected. Most designs add a top sheet or laminate the heater inside glass.
3. Very large panels may need bus bars or thicker coatings to maintain even heat.
FTO (fluorine-doped tin oxide) and ITO are two transparent conductive coatings used for heaters. They look similar, but they behave in different ways. Here is a clear overview:
| Feature | ITO Transparent Heater | FTO Transparent Heater |
| Clarity | Higher clarity, lower haze | Slightly lower clarity |
| Conductivity | Better resistance control | Higher resistance in general |
| Durability | Can scratch without protection | More scratch-resistant |
| Cost | Higher | Lower |
| Temperature stability | Good for optical cases | Good for high-temp environments |
| Best use | Cameras, displays, optics | Solar panels, larger windows |
If your project needs the highest clarity, ITO coated glass heater is the better match. If you want a lower budget option for large windows, FTO can work well.
ITO coated glass heater is used anywhere you need clear vision and gentle, even heat on a glass surface. Typical applications include:
To use an ITO transparent heater in a safe and stable way, you need to match the heater design with your power source, optics, and working environment.
1. Confirm the target surface temperature and defog time
For many optical systems, 35–60°C surface temperature is enough to remove fog and keep the window dry. If you need faster clear-up, you may choose higher power density. For gentle, energy-saving defog, you can work with lower density and a slower ramp.
2. Check the heater size, resistance, and rated voltage
ITO heaters are usually specified with length, width, and sheet resistance. From this, the supplier will give you a working voltage range. For example, a small camera heater may be designed for 5–12 V, while a larger window can use 12–24 V. Always follow the rated voltage and power data in the drawing.
3. Plan the electrical connection and cable route
The ITO transparent heater has bus bars or pads on two sides. You connect these pads to your harness through soldered wires, FPC tail, or a small connector. Keep the cable low-profile so it does not block the optical path or interfere with nearby parts. Many customers place the tail on a non-view area or behind a bezel.
4. Basic temperature control and safety
The simplest way is to use a fixed voltage with a series resistor or a current limit. For better control, many engineers add a thermistor, NTC, or temperature sensor near the glass. This sensor feeds a driver or controller that can switch the heater on and off or adjust output by PWM. This method stabilizes the glass temperature and avoids overheating under mild conditions.
5. Duty cycle and environment
Some systems run the heater only during startup or when fog is detected. Others keep a low-level heating all the time in cold regions. If your product faces vibration, outdoor rain, or salt spray, choose a heater and bonding structure suited for those stress conditions.
6. Validate the design in real conditions
Test the heater in a chamber or in field conditions with real humidity, airflow, and temperature swings. Watch how long it takes to clear fog and how warm the glass becomes. If needed, adjust power density, voltage, or control logic until you reach stable performance.
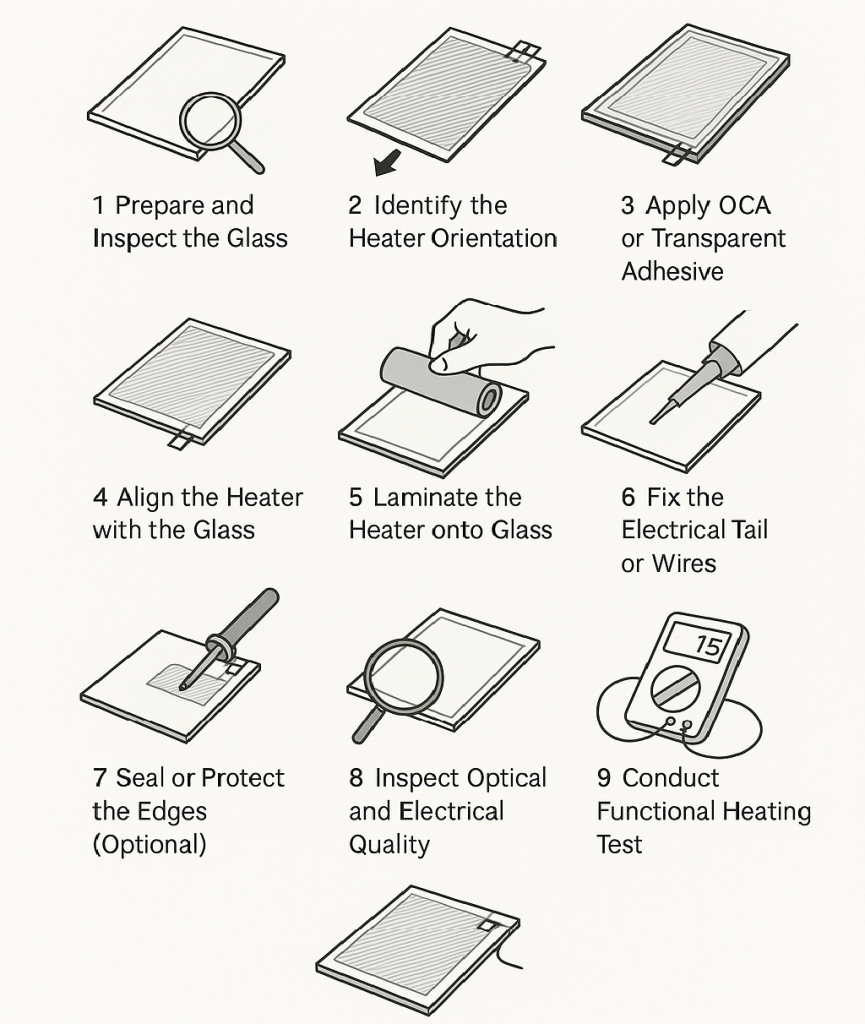
Step 1: Prepare and Inspect the Glass
Start by cleaning the glass surface to remove dust, fingerprints, and any oily residue. Use lint-free wipes and isopropyl alcohol to ensure the bonding area is clear and smooth. Look closely for scratches, chips, or coating defects, as these issues may affect both optical clarity and bonding strength once the heater is applied.
Step 2: Identify the Heater Orientation
Before bonding, confirm the correct orientation of the transparent heater. Check which side contains the ITO layer, where the bus bars are located, and the direction the electrical tail should exit. Proper orientation prevents signal interference, cable conflict, and optical shading after installation.
Step 3: Apply OCA or Transparent Adhesive
If the heater requires optical-grade bonding, apply the OCA (optically clear adhesive) or transparent adhesive to either the glass or the heater. Ensure the adhesive layer is free of trapped air and is evenly distributed. A clean and uniform adhesive layer is essential to achieving high optical clarity and stable adhesion under temperature changes.
Step 4: Align the Heater with the Glass
Place the heater above the glass and align its edges, viewing area, and electrode positions with precision. Good alignment ensures the heater will not obstruct the optical field and that the electrical tail exits at the correct location. Take your time during this step—once laminated, alignment cannot be corrected.
Step 5: Laminate the Heater Onto the Glass
Lower the heater onto the glass gradually, beginning from one side and working your way across. Use a soft silicone roller to press gently from the center outward, forcing out trapped air and preventing localized stress. Smooth lamination keeps the ITO layer intact and maintains full-area heating performance.
Step 6: Fix the Electrical Tail or Wires
After lamination, connect the heater’s pads to the power wires or FPC tail. Secure the solder joints carefully and add strain-relief tape or adhesive around the connection area. This added reinforcement protects the wires from vibration, bending, or long-term mechanical stress that could weaken the joint.
Step 7: Seal or Protect the Edges (Optional)
For heaters used outdoors or in humid environments, apply a protective seal around the heater’s edges. A thin bead of silicone, UV adhesive, or structural sealant prevents moisture ingress and improves long-term stability. Edge sealing is especially helpful for railway cameras, outdoor sensors, and freezer displays.
Step 8: Inspect Optical and Electrical Quality
Check the installed heater for optical defects such as bubbles, haze, dust spots, or misalignment. Next, measure the resistance across the bus bars to confirm it matches the design value. Any unexpected change in resistance may indicate damage to the ITO layer during lamination.
Step 9: Conduct a Functional Heating Test
Apply the rated voltage and monitor the heater’s warm-up behavior. Measure surface temperature and confirm that heating is even and reaches the target level within the expected time. A uniform temperature profile indicates correct bonding, clean electrical contact, and stable film quality.
Danyu Electronics helps customers turn optical heating ideas into working products. We support small-batch prototypes, large production runs, and special design needs. Our heaters are made with tight resistance control, clear optical grade material, and strict inspection for every piece.
We supply:
Our engineers can help you pick the right heater type, tune power density, optimize wiring, and find the best bonding method for your device. If your application needs a clean, stable, and thin heating layer, we can help you build it fast and with consistent quality.
For project inquiries, feel free to contact us at any time.
1. Can an ITO transparent heater run outdoors?
Yes. It works well for cameras, sensors, and windows exposed to outdoor moisture and temperature swings.
2. How hot can an ITO heater get?
Many reach -40–100°C based on voltage and size. Higher temperatures are also possible with tuned designs.
3. Does the heater affect camera image quality?
When bonded well, the effect is very small. Most customers reach near-original clarity.
4. Can I cut an ITO heater to a new shape?
No. Cutting will break the conductive layer. Custom shapes must be produced at the factory.
5. How long does an ITO heater last?
Most last for many years as long as the film is not bent or scratched.
+86 (755) 2909-1601
sales@best-heaters.com
5F, Bld7, Hengmingzhu Technology Industry Park, Xingqiao Tongfuyu Industry Zone, Gonghe, Shajing Town, Baoan District, Shenzhen,China
Simply drop your email or phone number in the contact form, and we'll promptly reply you shortly.